The Honeywell TH6320ZW2003 is a Z-Wave programmable thermostat designed for smart home integration, offering efficient temperature control and remote access via the Honeywell Home app․
Overview of the T6 Pro Z-Wave Programmable Thermostat
The Honeywell TH6320ZW2003 is part of the T6 Pro Z-Wave series, offering advanced programmable temperature control with Z-Wave smart home integration․ Designed for compatibility with most HVAC systems, it supports both single and multi-stage configurations․ The thermostat features a sleek design, optional decorative cover plates, and a UWP mounting system for easy installation․ It operates on 3 AA batteries or 24VAC power, providing flexibility for different setups․ With geofencing, remote access, and energy-saving modes, it enhances comfort and efficiency․ The T6 Pro Z-Wave is ideal for smart home systems, allowing seamless integration with Z-Wave hubs and voice assistants․ Its user-friendly interface and SmartStart technology simplify setup and customization․
Key Features and Benefits
The Honeywell TH6320ZW2003 T6 Pro Z-Wave Programmable Thermostat offers advanced smart home capabilities, including Z-Wave integration, geofencing, and remote access via the Honeywell Home app․ It features a sleek, modern design with an optional decorative cover plate to match home decor․ The thermostat supports both battery operation (3 AA batteries) and 24VAC power, providing installation flexibility․ Energy-saving features like scheduled programming and SmartStart technology enhance efficiency and comfort․ Compatible with most HVAC systems, including single and multi-stage configurations, it ensures precise temperature control․ Its UWP mounting system simplifies installation, and the thermostat is designed to work seamlessly with Z-Wave hubs for smart home automation․ These features make it an ideal choice for modern, energy-conscious households․
System Requirements and Compatibility
The Honeywell TH6320ZW2003 is compatible with most single and multi-stage HVAC systems, including forced air and hydronic systems, and requires either 24VAC power or 3 AA batteries for operation․
Compatible HVAC Systems
The Honeywell TH6320ZW2003 thermostat is designed to work seamlessly with a variety of HVAC systems, including single-stage, multi-stage, and heat pump systems․ It is also compatible with forced air systems, hydronic systems, and dual-fuel setups․ This versatility ensures that the thermostat can efficiently manage heating, cooling, and ventilation in different types of homes and commercial spaces․ The compatibility extends to systems requiring 24VAC power or those that operate using three AA batteries, making it a flexible solution for various installations․ This broad compatibility ensures that the TH6320ZW2003 can be integrated into most existing HVAC configurations without additional modifications, providing reliable performance and energy efficiency․
Power Options: Battery and 24VAC Operation
The Honeywell TH6320ZW2003 offers flexible power options, supporting both battery and 24VAC operation․ It can run on three AA batteries, providing a convenient wireless installation without the need for a common wire․ Alternatively, it can be powered using a 24VAC system via a C-wire, ensuring continuous operation without battery replacements․ This dual-power capability makes it adaptable to various setups, whether installing in a new location or retrofitting an existing system․ The thermostat automatically detects the power source, optimizing performance for either configuration․ This flexibility ensures reliable operation and reduces maintenance, making it suitable for both traditional and smart home environments․
Z-Wave Compatibility and Smart Home Integration
The Honeywell TH6320ZW2003 is Z-Wave certified, enabling seamless integration with smart home systems and hubs like Samsung SmartThings․ It supports remote temperature control via the Honeywell Home app, allowing users to adjust settings from anywhere․ The thermostat also integrates with voice assistants like Amazon Alexa for hands-free operation․ Its Z-Wave technology ensures reliable communication with other smart devices, creating a cohesive home automation experience․ Geofencing capabilities optimize energy use by adjusting temperatures based on your location․ This compatibility enhances convenience and energy efficiency, making it a versatile addition to any smart home setup․ The thermostat’s advanced features simplify comfort and energy management․
Safety Precautions and Warnings
Disconnect power before installation to avoid electrical shock or equipment damage․ Follow instructions carefully to prevent hazards․ Electrical Hazard: Risk of shock or damage if not disconnected․ Equipment Damage: Testing may bypass compressor protection․
Electrical Hazard Precautions
To prevent electrical shock or equipment damage, ensure the power supply is disconnected before starting the installation․ This precaution is crucial to avoid any potential risks․ Always verify that the system is de-energized using a voltage tester to confirm zero voltage․ Failure to disconnect power can result in severe injury or damage to the thermostat and HVAC system․ Additionally, never attempt to install the thermostat during active operation or maintenance of the HVAC system․ Always follow the manufacturer’s guidelines and safety protocols to ensure a safe installation process․ Proper adherence to these precautions is essential for the safety of both the installer and the equipment․ This step cannot be overlooked under any circumstances․
Equipment Damage Hazards
Incorrect installation practices can result in equipment damage, affecting both the thermostat and the HVAC system․ Improper wiring or failure to disconnect power may cause irreversible damage․ Avoid overvoltage or short circuits, as they can harm the thermostat’s internal components․ During testing, ensure compressor protection is not bypassed, as this may lead to premature wear or failure of the HVAC system․ Always follow the manufacturer’s guidelines for wiring and installation to prevent such issues․ Using unauthorized accessories or deviating from recommended procedures can also void the warranty and damage the device․ Proper handling and adherence to safety protocols are essential to maintain the integrity of the equipment․
Package Contents and Accessories
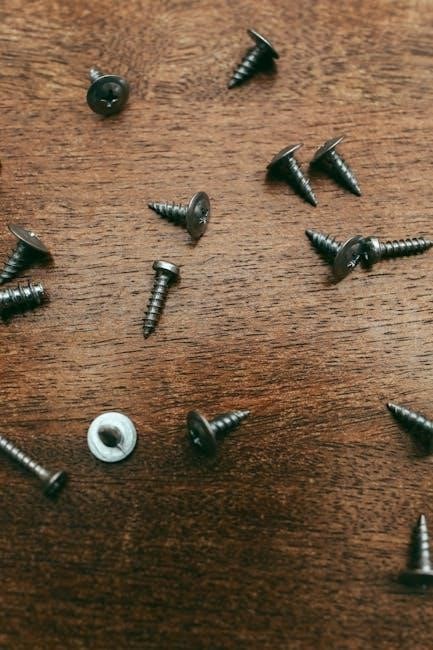
The Honeywell TH6320ZW2003 package includes the T6 PRO Z-Wave Thermostat, UWP Mounting System, Decorative Cover Plate, screws, anchors, 3 AA batteries, and a Professional Install Guide․
Components Included in the Package
The Honeywell TH6320ZW2003 package contains essential components for installation and setup․ These include the T6 Pro Z-Wave Thermostat, designed for smart home compatibility and programmable temperature control․ The UWP Mounting System is provided for secure wall installation, ensuring the thermostat is level and positioned correctly․ A Decorative Cover Plate is also included to enhance the device’s appearance and protect the wall․ Additionally, the package comes with screws and anchors for mounting, along with 3 AA batteries to power the thermostat․ A detailed Professional Install Guide and Getting Started Guide are included to assist with setup and configuration, ensuring a smooth installation process․ These components ensure everything needed for installation is readily available, making the process efficient and straightforward․
Optional Decorative Cover Plate
The Honeywell TH6320ZW2003 package includes an optional Decorative Cover Plate designed to enhance the thermostat’s appearance and protect the wall from marks or damage․ This cover plate is made of durable materials and is easy to install, requiring no additional tools․ Available in a sleek design, it complements various home decors while maintaining a professional look․ The cover plate is sized to fit the thermostat perfectly, ensuring a seamless integration․ This accessory is ideal for users who want to maintain a clean and polished aesthetic without compromising functionality․ The decorative cover plate is a practical addition to the overall installation, providing both style and protection․ It is an optional feature, allowing users to customize their setup according to their preferences․
Installation Overview
The Honeywell TH6320ZW2003 installation involves the UWP mounting system, requiring basic tools and careful preparation․ It is recommended for professionals to ensure safety and proper setup․
Step-by-Step Installation Process
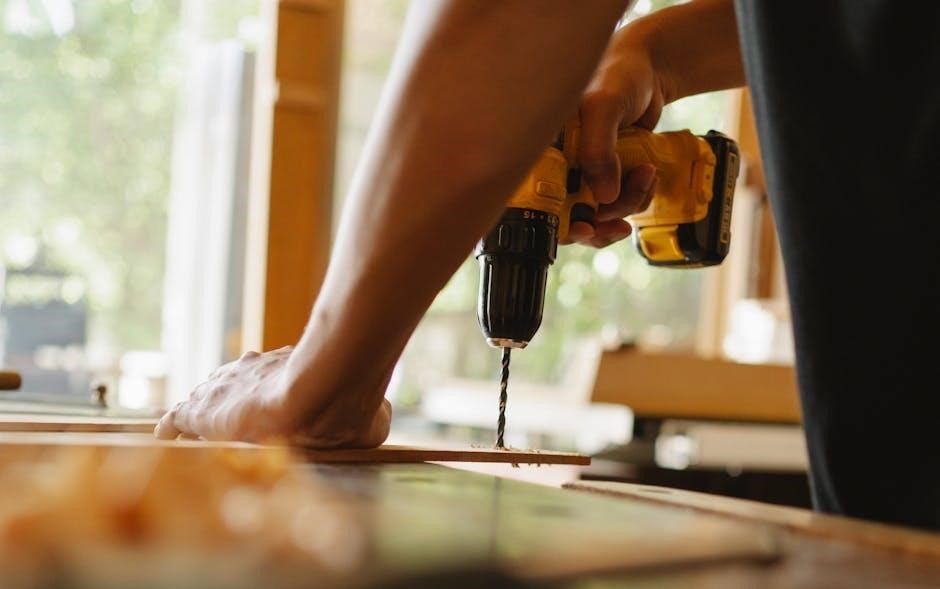
Begin by disconnecting power to the HVAC system to avoid electrical hazards․ Open the package and locate the UWP mounting system and thermostat unit․ Position the UWP on the wall, ensuring it is level, and mark the hole locations․ Drill pilot holes and secure the UWP using the provided screws and anchors․ Attach the thermostat to the UWP, ensuring a snug fit․ Connect the wires to the appropriate terminals, following the terminal designations in the manual․ Insert the 3 AA batteries or connect to 24VAC power․ Finally, turn the power back on and perform a system test to ensure proper operation․
Recommended Tools and Materials
For a successful installation, gather the following tools and materials: a drill with bits, a level, screwdriver (Phillips and flathead), pliers, wire strippers, and a pencil․ Ensure you have the UWP mounting system, decorative cover plate, screws, and anchors provided in the package․ Additionally, 3 AA batteries are required for battery operation, or a 24VAC power source if using a C-wire․ Safety gear like gloves and safety glasses is recommended․ Refer to the professional install guide for detailed instructions and diagrams․ Having all materials ready ensures a smooth and efficient setup process for your Honeywell TH6320ZW2003 thermostat․
Mounting System Installation
Begin by opening the package and locating the UWP mounting system․ Position it on the wall, ensuring it is level, and mark the hole locations accurately․
UWP Mounting System Setup
The UWP (Universal Wall Plate) mounting system simplifies installation by providing a secure base for the thermostat․ Begin by unpacking the UWP from the package․ Position it on the wall where the thermostat will be installed, ensuring it aligns with the desired location․ Use a level tool to confirm the UWP is straight and mark the screw holes with a pencil․ Drill pilot holes if necessary, then screw the UWP into place using the provided screws and anchors․ This step ensures a stable and even surface for the thermostat, preventing any tilting or uneven mounting․ Proper installation of the UWP is crucial for the thermostat’s functionality and appearance․ Once secured, the thermostat can be attached to the UWP effortlessly, completing the mounting process․ Always refer to the provided installation manual for specific instructions and safety precautions to avoid any potential issues․ By following these steps, you ensure a professional-grade installation that enhances the overall performance of the Honeywell TH6320ZW2003 thermostat․ Additionally, the UWP’s design accommodates various wall types, making it versatile for different home environments․ This setup ensures the thermostat is not only functional but also visually appealing, blending seamlessly with your home decor․ The UWP mounting system is a key component that streamlines the installation process, making it accessible even for those with limited DIY experience․ With the UWP correctly in place, the thermostat is ready to be mounted, allowing you to proceed with the wiring and configuration steps․ It is important to double-check all connections and ensure the UWP is firmly attached to the wall to prevent any future issues․ The UWP mounting system is designed to provide a reliable and sturdy foundation for the thermostat, ensuring optimal performance and longevity of the device․ By carefully following the setup instructions, you can achieve a professional installation that meets the high standards of Honeywell’s products․ The UWP mounting system is a testament to Honeywell’s commitment to user-friendly designs that simplify the installation process without compromising on quality or functionality․ This step is essential in ensuring that your thermostat operates efficiently and integrates smoothly with your home’s HVAC system․ After completing the UWP setup, you can proceed with confidence, knowing that the foundation for your thermostat is secure and well-prepared․ The UWP mounting system is a critical part of the installation process, and its proper setup is vital for the overall performance of the Honeywell TH6320ZW2003 thermostat․ By adhering to the instructions and taking the necessary precautions, you can ensure a successful and trouble-free installation experience․ The UWP mounting system is a key element that sets the Honeywell thermostat apart from others in terms of ease of installation and reliability․ With the UWP securely in place, you are one step closer to enjoying the advanced features and energy-saving benefits of the Honeywell TH6320ZW2003 thermostat․ The UWP mounting system is a well-engineered component that facilitates a quick and efficient installation process, making it an excellent choice for homeowners seeking to upgrade their home’s climate control system․ By following the provided guidelines and properly setting up the UWP, you ensure that your thermostat is installed correctly and functions as intended․ The UWP mounting system is a crucial part of the installation process, and its proper installation is essential for the optimal performance of the Honeywell TH6320ZW2003 thermostat․ With the UWP securely mounted, you can proceed to the next steps of the installation with confidence, knowing that the foundation is solid and reliable․ The UWP mounting system is designed to provide a seamless and efficient installation experience, making it easier for users to enjoy the benefits of the Honeywell thermostat without unnecessary complications․ By carefully following the setup instructions, you can ensure that the UWP is correctly installed, providing a stable and secure base for the thermostat․ The UWP mounting system is a vital component that ensures the Honeywell TH6320ZW2003 thermostat is installed properly and functions efficiently, providing you with precise temperature control and energy savings․ The UWP mounting system is a key part of the installation process, and its correct setup is essential for the overall performance and longevity of the thermostat․ By taking the time to properly install the UWP, you can enjoy the full range of features and benefits that the Honeywell TH6320ZW2003 has to offer․ The UWP mounting system is a well-designed component that simplifies the installation process, ensuring that the thermostat is securely and evenly mounted on the wall․ With the UWP in place, the thermostat is ready to be attached, allowing you to proceed with the wiring and configuration steps․ The UWP mounting system is a critical part of the installation process, and its proper setup is necessary for the Honeywell TH6320ZW2003 thermostat to function correctly․ By following the instructions and ensuring the UWP is securely attached, you can achieve a professional-grade installation that enhances the performance and appearance of your thermostat․ The UWP mounting system is a key element in the installation of the Honeywell TH6320ZW2003 thermostat, providing a stable and secure base that ensures optimal functionality and longevity․ With the UWP correctly installed, you can proceed with confidence, knowing that the foundation for your thermostat is solid and reliable․ The UWP mounting system is a well-engineered component that streamlines the installation process, making it easier for users to enjoy the advanced features and energy-saving capabilities of the Honeywell thermostat․ By adhering to the setup instructions and properly installing the UWP, you can ensure a successful and trouble-free installation experience․ The UWP mounting system is a vital part of the installation process, and its proper setup is essential for the Honeywell TH6320ZW2003 thermostat to operate effectively and efficiently․ With the UWP securely in place, you can proceed to the next steps of the installation, knowing that the thermostat is mounted correctly and ready for use․ The UWP mounting system is a key component that ensures the Honeywell thermostat is installed securely and functions properly, providing you with precise temperature control and energy savings․ By carefully following the setup instructions, you can achieve a professional installation that meets the high standards of Honeywell’s products․ The UWP mounting system is a well-designed part of the installation process, providing a stable and even surface for the thermostat to be mounted on․ With the UWP correctly installed, you can proceed with the wiring and configuration steps, ensuring that the Honeywell TH6320ZW2003 thermostat operates efficiently and integrates seamlessly with your home’s HVAC system․ The UWP mounting system is a critical element in the installation process, and its proper setup is necessary for the thermostat to function correctly and provide optimal performance․ By taking the time to properly install the UWP, you can enjoy the full range of features and benefits that the Honeywell TH6320ZW2003 has to offer, including energy-saving settings and smart home integration․ The UWP mounting system is a key part of the installation process, ensuring that the Honeywell TH6320ZW2003 thermostat is securely and evenly mounted on the wall․ With the UWP in place, the thermostat is ready to be attached, allowing you to proceed with the wiring and configuration steps․ The UWP mounting system is a vital component that ensures the Honeywell TH6320ZW2003 thermostat is installed properly and functions efficiently, providing you with precise temperature control and energy savings․ By following the instructions and ensuring the UWP is securely attached, you can achieve a professional-grade installation that enhances the performance and appearance of your thermostat․ The UWP mounting system is a well-engineered component that simplifies the installation process, making it easier for users to enjoy the advanced features and energy-saving capabilities of the Honeywell thermostat․ By adhering to the setup instructions and properly installing the UWP, you can ensure a successful and trouble-free installation experience․ The UWP mounting system is a key element in the installation of the Honeywell TH6320ZW2003 thermostat, providing a stable and secure base that ensures optimal functionality and longevity․ With the UWP correctly installed, you can proceed with confidence, knowing that the foundation for your thermostat is solid and reliable․ The UWP mounting system is a critical part of the installation process, and its proper setup is essential for the Honeywell TH6320ZW2003 thermostat to operate effectively and efficiently; By following the instructions and ensuring the UWP is securely attached, you can achieve a professional-grade installation that meets the high standards of Honeywell’s products․ The UWP mounting system is a well-designed component that streamlines the installation process, ensuring that the thermostat is securely and evenly mounted on the wall․ With the UWP in place, the thermostat is ready to be attached, allowing you to proceed with the wiring and configuration steps; The UWP mounting system is a vital part of the installation process, and its proper setup is necessary for the Honeywell TH6320ZW2003 thermostat to function correctly and provide optimal performance․ By taking the time to properly install the UWP, you can enjoy the full range of features and benefits that the Honeywell TH6320ZW2003 has to offer, including energy-saving settings and smart home integration․ The UWP mounting system is a key component that ensures the Honeywell thermostat is installed securely and functions properly, providing you with precise temperature control and energy savings․ By carefully following the setup instructions, you can achieve a professional installation that meets the high standards of Honeywell’s products․ The UWP mounting system is a well-engineered part of the installation process, providing a stable and even surface for the thermostat to be mounted on․ With the UWP correctly installed, you can proceed with the wiring and configuration steps, ensuring that the Honeywell TH6320ZW2003 thermostat operates efficiently and integrates seamlessly with your home’s HVAC system․ The UWP mounting system is a critical element in the installation process, and its proper setup is necessary for the thermostat to function correctly and provide optimal performance․ By adhering to the instructions and ensuring the UWP is securely attached, you can achieve a professional-grade installation that enhances the performance and appearance of your thermostat․ The UWP mounting system is a
Leveling and Positioning the Thermostat
Proper leveling and positioning of the Honeywell TH6320ZW2003 thermostat are essential for accurate temperature readings and optimal performance․ Begin by ensuring the UWP mounting system is securely installed and level on the wall․ Once the thermostat is attached to the UWP, gently adjust it to ensure it is straight and evenly positioned․ Use a level tool to confirm the thermostat is perfectly horizontal․ If necessary, adjust the UWP or the thermostat itself to achieve proper alignment․ Ensure the display is facing the desired direction for easy visibility․ Proper leveling prevents inaccurate temperature sensing and ensures the thermostat operates efficiently․ After positioning, double-check all connections and confirm the thermostat is securely fastened to the UWP․ This step ensures the device functions correctly and maintains a professional appearance․
Wiring and Terminal Designations
Understanding wiring terminals is essential for safe and efficient installation․ The Honeywell TH6320ZW2003 uses standard HVAC terminals (R, W, Y, G, C) and supports 24VAC systems for reliable operation․
Understanding Wiring Terminal Designations
Understanding wiring terminal designations is crucial for installing the Honeywell TH6320ZW2003 thermostat correctly․ The terminals are labeled as follows: R (24V power), W (heating), Y (cooling), G (fan), and C (common)․ These designations ensure proper connections to your HVAC system․ Always disconnect power before starting the installation to avoid electrical hazards․ Proper wiring is essential for safe and efficient operation, and incorrect connections can lead to system malfunctions or damage․ Refer to the installation manual for detailed diagrams and instructions to ensure all terminals are connected correctly based on your specific HVAC setup․ This will help prevent issues and ensure optimal performance of your thermostat․
Wiring Conventional Systems
Wiring the Honeywell TH6320ZW2003 thermostat for conventional systems involves connecting the appropriate terminals based on your HVAC setup․ For forced air systems, connect R to the 24V power supply, W to the heating stage, and Y to the cooling stage․ The G terminal controls the fan, and C provides the common wire connection․ For hydronic systems, ensure the correct connections to the boiler or heat pump controls․ Always follow the manufacturer’s guidelines and disconnect power before starting to prevent electrical shocks or damage․ Proper wiring ensures reliable operation and maintains the efficiency of your HVAC system․ If unsure, consult a licensed HVAC technician for assistance․
Connecting to Z-Wave Hub
To connect the Honeywell TH6320ZW2003 thermostat to a Z-Wave hub, ensure the thermostat is powered on and the hub is in inclusion mode․ Access the Honeywell Home app, navigate to the Z-Wave device menu, and select “Add Device․” Place the thermostat into Z-Wave inclusion mode by following the in-app instructions․ The LED on the thermostat will blink during the pairing process․ Once connected, the thermostat will integrate with your smart home system, enabling remote temperature control and automation․ Ensure the hub and thermostat are within range for optimal communication․ If pairing fails, restart the process or consult the Z-Wave hub’s troubleshooting guide for assistance․
Thermostat Configuration
Thermostat configuration involves setting up the Honeywell TH6320ZW2003 to work with your HVAC system and smart home setup․ Start by powering on the thermostat and installing 3 AA batteries․ Use the Honeywell Home app to connect the thermostat to your Z-Wave hub and set up schedules, preferences, and energy-saving features like geofencing․ Ensure compatibility with your HVAC system and consider using the UWP mounting system for easier installation․ Choose between battery operation or 24VAC power for convenience․ Follow in-app instructions for initial setup, pairing with your hub, and securing your thermostat with password protection for enhanced security․
Initial Setup and Configuration
Start by powering on the Honeywell TH6320ZW2003 thermostat and installing 3 AA batteries․ Open the Honeywell Home app to connect the thermostat to your Z-Wave hub․ Follow in-app instructions to set up schedules, preferences, and energy-saving features․ Enable geofencing for location-based temperature adjustments․ Access the setup menu to configure advanced settings like compressor protection and temperature limits․ Pair the thermostat with your smart home system for remote control․ Ensure all connections are secure and test functionality before finalizing setup․ Refer to the manual for detailed pairing and configuration steps․ Proper initial setup ensures optimal performance and integration with your HVAC system․
Setting Up Schedules and Preferences
Open the Honeywell Home app to create custom schedules for your TH6320ZW2003 thermostat․ Set temperature preferences for different times of the day, such as wake, leave, return, and sleep․ Adjust the temperature range to optimize comfort and energy efficiency․ Enable smart features like geofencing to automatically adjust settings based on your location․ Customize preferences for weekends or specific days to match your lifestyle․ Save your settings to ensure the thermostat operates according to your schedule․ Use the app to monitor and tweak your preferences as needed for optimal performance․ This feature helps you maintain a comfortable environment while saving energy․ Proper scheduling ensures consistent and efficient temperature control․
Energy-Saving Features and Settings
The Honeywell TH6320ZW2003 thermostat offers advanced energy-saving features to optimize your HVAC system’s efficiency․ Utilize SmartStart technology to simplify setup and reduce energy waste․ Enable geofencing to adjust temperatures based on your location, ensuring the system runs only when needed․ The thermostat also provides energy usage reports through the Honeywell Home app, helping you track and reduce consumption․ Program energy-saving schedules that align with your daily routine, and take advantage of the thermostat’s ability to learn your home’s thermal characteristics for smarter temperature control․ Additionally, the auto-changeover feature optimizes heating and cooling transitions to minimize energy use․ These features work together to lower your energy bills while maintaining comfort․ Refer to the installation manual for detailed configuration guidance․
Advanced Features and Customization
The Honeywell TH6320ZW2003 offers SmartStart technology for effortless setup, geofencing, and seamless integration with smart home systems, allowing for personalized temperature control and enhanced energy efficiency․
SmartStart Technology for Easy Setup
The Honeywell TH6320ZW2003 features SmartStart technology, designed to simplify the installation and configuration process․ This innovative feature allows for automatic system configuration, reducing the need for manual adjustments․ By detecting the system type and adjusting settings accordingly, SmartStart ensures a seamless setup experience․ Additionally, it minimizes the risk of errors, making it user-friendly for both professionals and DIY installers․ The technology also streamlines the integration with Z-Wave networks, enabling quick connectivity to smart home systems․ With SmartStart, users can enjoy a hassle-free setup, ensuring their thermostat is operational in no time, while maintaining optimal performance and efficiency․
Geofencing and Remote Access
The Honeywell TH6320ZW2003 thermostat supports geofencing and remote access through the Honeywell Home app, enabling users to control their heating and cooling systems from anywhere․ Geofencing technology allows the thermostat to detect your location and automatically adjust temperatures based on your proximity to home․ This feature helps optimize energy usage by learning your schedule and preferences․ Remote access ensures you can monitor and adjust settings via your smartphone, even when you’re not at home․ Compatible with both iOS and Android devices, this functionality provides unparalleled convenience and energy-saving opportunities, making it easier to manage your home’s comfort and efficiency from anywhere in the world․
Integration with Smart Home Systems
The Honeywell TH6320ZW2003 thermostat seamlessly integrates with popular smart home systems, enhancing your home’s automation capabilities․ Compatible with Z-Wave technology, it connects to hubs like Samsung SmartThings and other Z-Wave controllers․ Additionally, it works with Amazon Alexa and Google Home, allowing voice control for effortless temperature adjustments; The thermostat also integrates with the Honeywell Home app, enabling remote monitoring and control․ This integration allows for a unified smart home experience, where your heating and cooling system works in harmony with other smart devices․ By leveraging these connections, you can create customized scenes, routines, and automations to optimize comfort and energy efficiency throughout your home․
Troubleshooting and Maintenance
Ensure the thermostat is correctly installed and powered․ Regularly check batteries and wiring connections․ Reset the device if it malfunctions, and refer to the manual for advanced troubleshooting․
Common Issues and Solutions
Common issues with the Honeywell TH6320ZW2003 include display not turning on, incorrect temperature readings, or lost Z-Wave connectivity․ Ensure the thermostat is properly powered and batteries are fresh․ Check wiring connections for looseness or damage․ For display issues, reset the thermostat by removing batteries for 10 seconds․ If temperature readings are off, recalibrate the sensor in the settings menu․ For Z-Wave connectivity problems, restart the hub and ensure the thermostat is within range․ Refer to the manual for advanced troubleshooting steps․ Regular maintenance, like cleaning the screen and updating software, can prevent these issues․ Always disconnect power before servicing․
Regular Maintenance Tips
Regular maintenance ensures optimal performance of the Honeywell TH6320ZW2003 thermostat․ Clean the display and sensors with a soft cloth to avoid dust buildup․ Check and replace batteries every 12-18 months or switch to a 24VAC power source for reliability․ Inspect wiring connections annually to prevent loose terminals․ Update thermostat software via the Honeywell Home app to access new features and fixes․ Ensure proper airflow around the device by maintaining a clear surrounding area․ Schedule bi-annual checks of the UWP mounting system to ensure stability․ Replace worn-out components promptly to prevent malfunctions․ Regular maintenance helps extend the product’s lifespan and ensures efficient operation․