This manual unlocks your Nikon Coolpix’s potential‚ guiding you from initial setup to advanced features. Explore e-invoicing systems and confidently navigate your camera’s functions!
Understanding Your Coolpix Model
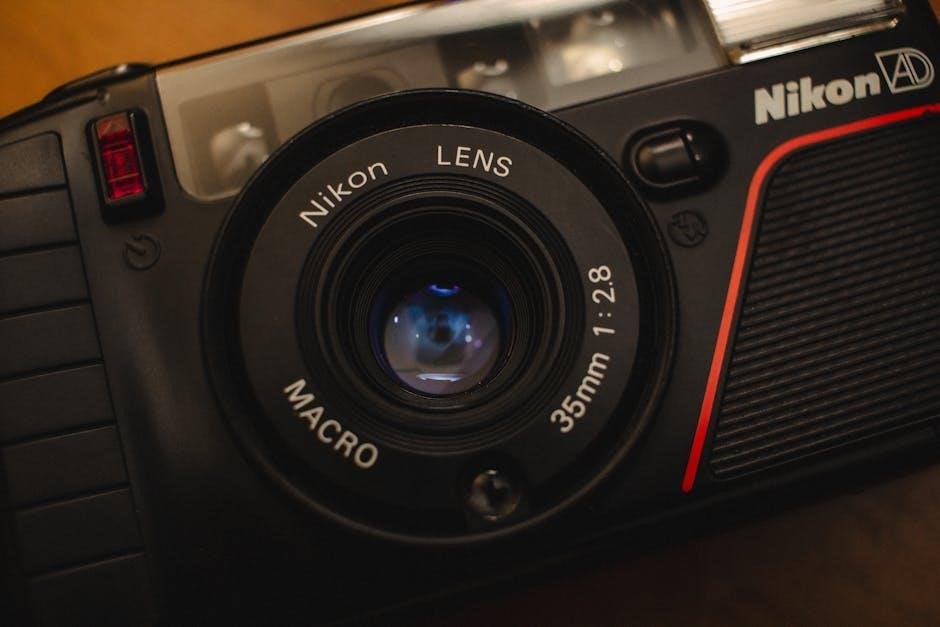
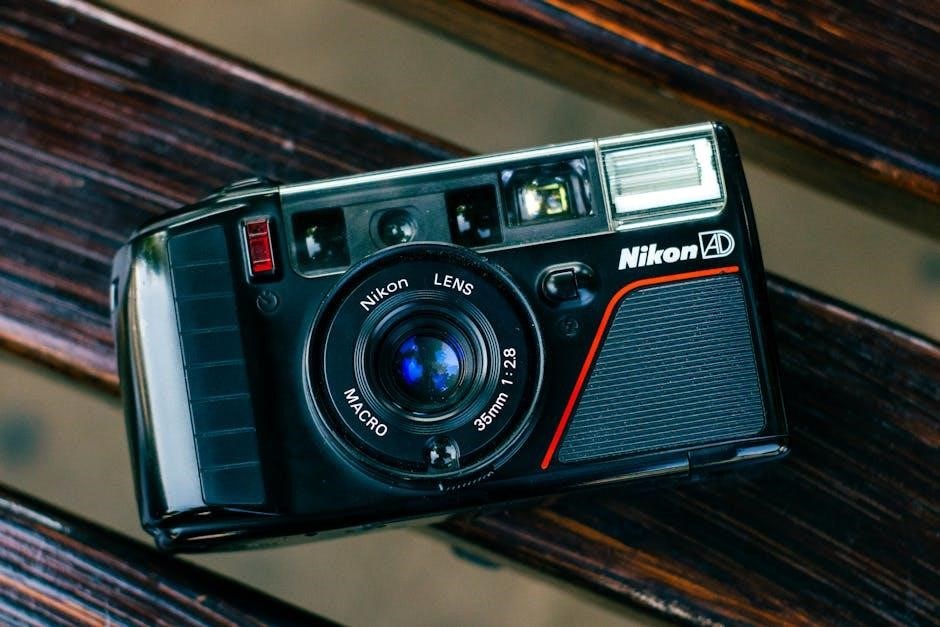
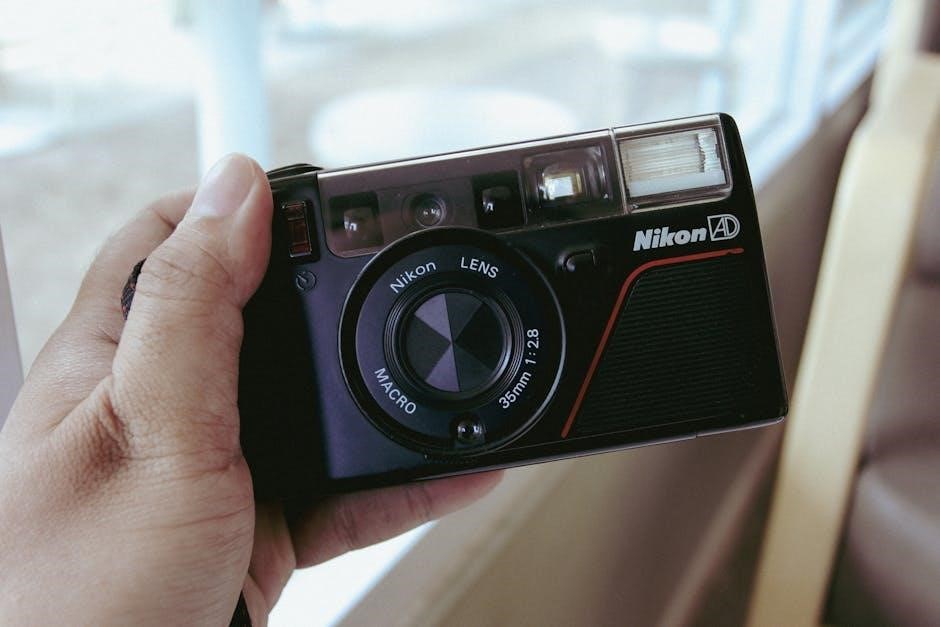
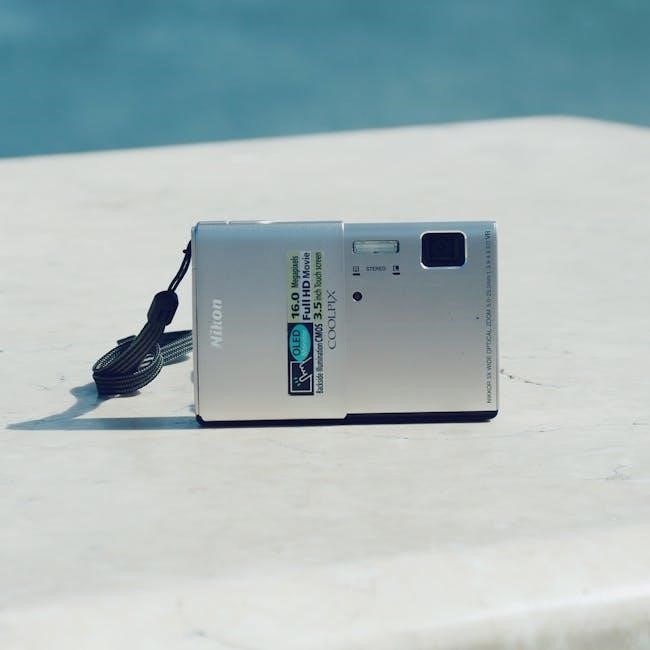
Your Nikon Coolpix represents a blend of innovative imaging technology and user-friendly design. Familiarizing yourself with its specific features is key to maximizing its capabilities. This section details the components‚ buttons‚ and ports unique to your model – whether it’s a P610 or a 4300.
Understanding the menu system and mode dial is crucial. As of April 14‚ 2026‚ alongside navigating new systems like KSeF‚ mastering your camera’s controls will unlock creative potential. Explore the camera’s capabilities and prepare for seamless photo and video capture.
What’s Included in the Manual
This comprehensive manual covers everything from initial setup – including battery charging and memory card insertion – to advanced shooting techniques. You’ll find detailed explanations of shooting modes like Auto‚ Portrait‚ and Night mode‚ alongside settings adjustments for image quality‚ ISO‚ and white balance.
We’ll also guide you through connectivity options‚ such as USB and SnapBridge‚ mirroring the evolving digital landscape‚ including systems like KSeF. Troubleshooting tips and maintenance advice ensure your Coolpix remains a reliable companion for years to come.

Getting Started with Your Nikon Coolpix
Begin your journey with simple steps: charging the battery‚ inserting a memory card‚ and powering on your Coolpix‚ ready for capturing stunning images!
Charging the Battery
Proper battery charging ensures optimal performance and longevity for your Nikon Coolpix. Utilize the provided USB cable and AC adapter‚ connecting them to your camera and a power outlet. A charging indicator light will illuminate‚ typically red while charging and turning off or changing color when complete.
Avoid using third-party chargers‚ as they may damage the battery or camera. Initial charging may take several hours. For best results‚ fully discharge and recharge the battery periodically. Store the battery in a cool‚ dry place when not in use to maximize its lifespan.
Inserting the Memory Card
To store your photos and videos‚ you’ll need to insert a compatible memory card into your Nikon Coolpix. Locate the memory card slot‚ usually on the side or bottom of the camera. Gently insert the card‚ ensuring the correct orientation – typically label-side up. A click will confirm it’s securely in place.
Supported card types often include SD‚ SDHC‚ and SDXC. Avoid forcing the card; if it doesn’t insert easily‚ check the orientation again. To remove the card‚ gently press it inward to release the locking mechanism‚ then pull it out. Always handle cards with care to prevent data corruption.
Powering On and Off
To power on your Nikon Coolpix‚ locate the power button – typically found on top of the camera. Press it firmly; the LCD screen will illuminate‚ indicating the camera is active. The lens will also extend. To power off‚ press the same button again. The screen will darken‚ and the lens will retract.
Some models feature an automatic power-off function to conserve battery life. If the camera remains idle for a set period‚ it will shut down automatically. Ensure the battery has sufficient charge for optimal performance. Proper powering on and off extends the camera’s lifespan.
Basic Operations
Mastering fundamental controls – menu navigation‚ mode dial usage‚ and capturing your first image – unlocks the Nikon Coolpix’s core functionality for effortless photography.
Navigating the Menu
The Nikon Coolpix menu system is your central hub for customizing camera settings. Access it via the menu button‚ typically indicated by a wrench or similar icon. Use the directional pad or touchscreen (if equipped) to scroll through categories like shooting settings‚ setup‚ and playback.
Within each category‚ you’ll find numerous options to adjust image quality‚ ISO‚ white balance‚ and more. Pay attention to on-screen explanations for each setting. Remember that menu structures can vary slightly between Coolpix models‚ so consult your specific manual for detailed guidance. Efficient menu navigation is key to unlocking your camera’s full potential.
Using the Mode Dial
The Mode Dial‚ prominently located on top of your Nikon Coolpix‚ is your gateway to different shooting scenarios. Rotate it to select options like Auto‚ Scene modes (Portrait‚ Landscape‚ Sports)‚ Night mode‚ and Program mode. Auto mode simplifies settings for beginners‚ while Scene modes optimize for specific subjects.
Experiment with each mode to understand its effects. Program mode offers more control while still assisting with exposure. Familiarizing yourself with the Mode Dial allows for quick adjustments based on your photographic needs‚ ensuring you capture the perfect shot in any situation.
Taking Your First Picture
Ready to capture memories? First‚ ensure your Nikon Coolpix has a charged battery and a memory card inserted. Power on the camera using the power button. Select your desired shooting mode using the Mode Dial – Auto is a great starting point. Compose your shot using the LCD screen.
Half-press the shutter button to focus; the camera will confirm focus with a beep or indicator. Fully press the shutter button to take the picture! Review your image on the LCD screen. Congratulations‚ you’ve taken your first picture!
Shooting Modes Explained
Explore diverse settings! From effortless Auto mode to specialized Scene modes like Portrait‚ Landscape‚ and Sports‚ and even Night mode for low-light conditions.
Auto Mode for Beginners
Auto mode simplifies photography‚ letting the Nikon Coolpix automatically adjust settings for optimal results. It’s perfect for beginners‚ eliminating the need to understand complex camera configurations. The camera intelligently analyzes the scene – detecting brightness‚ subject distance‚ and movement – and selects the most appropriate settings. This includes exposure‚ focus‚ and white balance.
Simply point and shoot! Auto mode ensures clear‚ well-exposed photos in various conditions. While offering convenience‚ remember that you relinquish creative control over specific settings. However‚ it’s an excellent starting point for learning and capturing everyday moments effortlessly.
Scene Modes: Portrait‚ Landscape‚ Sports
Scene modes optimize the Coolpix for specific shooting situations; Portrait mode softens backgrounds and enhances skin tones for flattering results. Landscape mode prioritizes sharpness and vibrant colors‚ ideal for expansive views. Sports mode utilizes a faster shutter speed to freeze motion‚ capturing action clearly.
These pre-set configurations simplify achieving professional-looking images without manual adjustments. Selecting the appropriate scene mode ensures the camera prioritizes settings crucial for that particular subject. Experiment with each mode to understand their effects and enhance your photographic creativity‚ moving beyond basic auto settings;
Night Mode and Low-Light Photography
Night mode extends shutter speed to capture more light in dark environments‚ crucial for cityscapes or dimly lit scenes. A tripod is highly recommended to prevent blur due to longer exposures. Consider increasing the ISO sensitivity (within reasonable limits) to further brighten images‚ but be aware of potential noise.
For handheld low-light shots‚ utilize a stable stance and brace the camera against a solid object. Explore the camera’s built-in noise reduction features to minimize graininess. Mastering low-light photography unlocks creative possibilities beyond well-lit conditions.
Understanding Camera Settings
Explore image quality‚ ISO‚ and white balance options to tailor your photos. These settings significantly impact image clarity‚ brightness‚ and color accuracy.
Image Quality and Resolution
Selecting the right image quality and resolution is crucial for optimal results. Your Nikon Coolpix offers various options‚ typically including RAW‚ Large/Fine‚ Large/Normal‚ Medium/Fine‚ and Small/Fine. Higher resolutions capture more detail‚ ideal for large prints or cropping‚ but require more storage space.
RAW format provides maximum editing flexibility‚ while JPEG formats (Fine/Normal) offer convenience and smaller file sizes. Consider your intended use – web sharing needs lower resolution than professional printing. Experiment with different settings to find the balance between quality and file size that suits your needs best.
ISO Sensitivity Settings
ISO controls your camera’s sensitivity to light. Lower ISO settings (e.g.‚ ISO 100) are best for bright conditions‚ delivering cleaner images with minimal noise. As light decreases‚ increase the ISO (e.g.‚ ISO 800‚ 1600‚ or higher). However‚ higher ISOs introduce more digital noise‚ potentially reducing image quality.
Auto ISO is convenient‚ letting the camera choose the optimal setting. Experiment with manual ISO control to understand the trade-off between brightness and noise. For low-light situations‚ a tripod is recommended to avoid blurry images when using higher ISO values.
White Balance Adjustment
White balance (WB) ensures accurate color reproduction under different lighting conditions. Incorrect WB can result in color casts – images appearing too blue‚ yellow‚ or red. Your Coolpix offers several WB presets‚ including Auto‚ Daylight‚ Cloudy‚ Fluorescent‚ and Incandescent.
Auto WB generally performs well‚ but manual adjustments are sometimes needed. Experiment with presets to find the best setting for your scene. Custom WB allows you to set a precise balance using a white or gray card for optimal color accuracy‚ especially in challenging lighting environments.
Zoom and Focus Features
Explore optical zoom for detailed shots and utilize auto or manual focus modes for sharp images. Macro mode excels at capturing stunning close-up details!
Using the Optical Zoom
The Nikon Coolpix features a powerful optical zoom‚ allowing you to get closer to your subject without sacrificing image quality. Unlike digital zoom‚ which simply crops and enlarges the image‚ optical zoom utilizes the lens’s physical focal length to magnify the scene. This results in sharper‚ more detailed pictures‚ even at maximum zoom levels;
To activate the zoom‚ use the zoom lever typically located around the shutter button. Pushing it forward zooms in‚ while pulling it back zooms out. Pay attention to the zoom indicator on the screen to monitor your magnification level. Remember that using extreme zoom levels can sometimes introduce slight camera shake‚ so consider using a tripod for optimal stability.
Focus Modes: Auto and Manual
Your Nikon Coolpix offers both Auto and Manual focus modes‚ providing flexibility for various shooting scenarios. Auto focus is ideal for everyday photography‚ automatically detecting and locking focus on your subject. The camera intelligently selects the focus point‚ simplifying the process.
However‚ for more control‚ switch to Manual focus. This allows you to precisely select the focus point yourself‚ useful for macro shots or when the auto focus struggles in challenging lighting conditions. Use the directional pad or touchscreen (if equipped) to adjust the focus until your subject appears sharp on the LCD screen.
Macro Mode for Close-Up Shots
Capture intricate details with your Nikon Coolpix’s Macro mode! This specialized setting allows you to focus on subjects extremely close to the lens – perfect for flowers‚ insects‚ or small objects. Access Macro mode through the Mode dial or the camera’s menu system.
When activated‚ the camera adjusts its focusing range to prioritize nearby subjects. Be mindful of shallow depth of field at close distances; ensure your subject is fully within the focused area. Utilize a stable shooting position or a tripod to avoid blur‚ especially in low light.
Advanced Features
Explore creative control! Master flash settings‚ video recording‚ and the self-timer for stunning photos and videos with your Nikon Coolpix camera.
Using the Flash Effectively
The Nikon Coolpix flash offers various modes to enhance your photography. Auto flash intelligently determines when flash is needed‚ while Red-Eye Reduction minimizes the red-eye effect in portraits. For creative control‚ explore Fill Flash to brighten subjects against strong backlighting‚ or utilize Slow Sync to combine flash with a slower shutter speed for atmospheric night shots. Experiment with flash exposure compensation to fine-tune the flash intensity. Remember to consider the distance to your subject; closer subjects require less flash power. Understanding these settings unlocks better‚ more vibrant images in diverse lighting conditions.
Shooting Videos with Your Coolpix
Your Nikon Coolpix excels at video recording! Access video mode via the Mode Dial. Experiment with different resolutions and frame rates – higher resolutions (like 4K‚ if supported) offer greater detail‚ while higher frame rates (60fps) are ideal for capturing fast action smoothly. Utilize the optical zoom during recording‚ but avoid rapid zooming. Ensure sufficient lighting for optimal video quality. Stabilize your camera using a tripod or steady surface to minimize shake. Review your footage immediately after recording to confirm satisfactory results and adjust settings accordingly.
Using the Self-Timer
The self-timer feature is perfect for group photos or when you want to be included in the shot! Access the self-timer function through the camera’s menu. You can typically select a delay of 2‚ 5‚ or 10 seconds. Press the shutter button to initiate the countdown; the camera will beep to signal the impending capture. Ensure everyone is positioned and ready before the timer starts. Utilize a stable surface or tripod to prevent camera shake during the exposure. Experiment with different timer durations to achieve the desired composition.
Connectivity and Transferring Photos
Seamlessly transfer your captured memories! Connect via USB to your computer‚ utilize SnapBridge for wireless transfer‚ or view photos on your TV using HDMI.
Connecting to a Computer via USB
Establishing a USB connection allows for direct photo transfer and camera control. First‚ ensure your camera is powered off. Use the provided USB cable to connect the Coolpix to a USB port on your computer. Power on the camera; a connection prompt should appear.
Select the appropriate mode – typically ‘MTP’ for transferring files like photos and videos‚ or ‘PTP’ for image viewing. Your computer should recognize the camera as a removable drive. You can then copy and paste your images to your desired folder. Remember to safely eject the camera from your computer before disconnecting the USB cable to prevent data corruption.
Wireless Transfer using SnapBridge
SnapBridge facilitates seamless wireless image transfer between your Nikon Coolpix and smartphone or tablet. Download and install the SnapBridge app from your device’s app store. Enable Bluetooth on both your camera and mobile device. Within the camera’s menu‚ navigate to the SnapBridge settings and pair the devices.
Once connected‚ images can automatically transfer to your phone as you shoot‚ or you can manually select images for transfer. SnapBridge also allows for remote camera control and firmware updates. Ensure both devices remain within Bluetooth range for successful transfers.
Using HDMI for TV Output
Connect your Nikon Coolpix to a compatible television using a mini-HDMI cable (sold separately). Locate the HDMI port on your camera – typically found under a protective cover. Connect the other end of the HDMI cable to an available HDMI input on your TV.
Power on both the camera and the TV‚ then select the correct HDMI input on your TV using the remote control. The camera’s display will appear on the TV screen‚ allowing you to view photos and videos in a larger format. Adjust TV settings as needed for optimal viewing.
Troubleshooting Common Issues
Resolve typical problems like camera power failures‚ image quality concerns‚ and memory card errors with this section’s guidance for a smooth experience.
Camera Not Turning On
If your Nikon Coolpix fails to power on‚ first ensure the battery is fully charged and correctly inserted. Try a different‚ known-good battery if possible. Verify the power switch is in the ‘ON’ position – sometimes it requires a firm press. Check for any obstructions around the battery compartment or power button.
If the issue persists‚ attempt a reset by removing the battery and memory card for several minutes‚ then reinserting them. A completely drained battery might require a longer charging period before the camera responds. Consult the manual for specific troubleshooting steps related to your Coolpix model.
Image Quality Problems
Poor image quality on your Nikon Coolpix can stem from several factors. Ensure the lens is clean‚ free from smudges or dust. Check your image quality settings; lower resolutions result in less detail. Experiment with ISO settings – higher ISOs introduce noise‚ especially in low light.
Verify white balance is correctly set for the lighting conditions. Incorrect white balance causes color casts. Also‚ confirm the focus is sharp; blurry images appear low quality. Review the memory card for potential corruption‚ and try a different card if issues persist.
Memory Card Errors
Encountering memory card errors with your Nikon Coolpix? First‚ ensure the card is properly inserted and compatible with your camera model. A “Card Error” message often indicates a corrupted card; try reformatting it within the camera (this erases all data!). If reformatting fails‚ the card may be physically damaged and require replacement.
Avoid removing the card during data transfer. Check for write-protection lock switches on the card itself. Finally‚ using high-quality‚ reputable brand memory cards minimizes the risk of these frustrating errors.
Maintenance and Care
Protect your investment! Regularly clean the lens‚ shield from damage‚ and properly store the battery for optimal performance and longevity of your Coolpix.
Cleaning the Lens
Maintaining a pristine lens is crucial for optimal image quality. Use a dedicated lens cleaning cloth – microfiber is ideal – to gently wipe away dust and fingerprints. Avoid harsh chemicals or abrasive materials‚ as these can damage the lens coating. For stubborn smudges‚ apply a small amount of lens cleaning solution to the cloth‚ not directly onto the lens.
Always use gentle‚ circular motions. Regularly inspect the lens for any visible debris and clean as needed. Proper lens care ensures clear‚ sharp photos and extends the lifespan of your Nikon Coolpix.
Protecting Your Camera from Damage
Safeguarding your Nikon Coolpix is essential for longevity. Avoid extreme temperatures and humidity‚ which can affect internal components. When not in use‚ store the camera in a protective case or bag to shield it from dust‚ scratches‚ and impacts. Be mindful of sand and water‚ especially during outdoor adventures.
Consider a lens protector to prevent scratches. Handle the camera with care‚ avoiding drops or forceful impacts. Regular maintenance and cautious handling will ensure years of reliable performance from your Coolpix.
Battery Care and Storage
Maximize your Nikon Coolpix’s battery life with proper care. Avoid fully discharging the battery before recharging‚ as this can shorten its lifespan. Store the battery in a cool‚ dry place‚ away from direct sunlight and extreme temperatures. If storing for extended periods‚ charge it to around 50% before storage.
Only use the Nikon-supplied charger to prevent damage. Do not short-circuit the battery terminals. Proper battery maintenance ensures reliable power for capturing your precious moments‚ extending its usability.

Frequently Asked Questions (FAQ)
Find answers to common issues like error messages‚ factory resets‚ and accessing support resources for your Nikon Coolpix. KSeF guidance is also available.
Understanding Error Messages
Your Nikon Coolpix displays error messages to indicate problems. Common codes relate to the memory card (check insertion/compatibility)‚ battery (charge or replace)‚ or lens issues (clean or seek service). Refer to the manual’s dedicated error code section for specific troubleshooting steps.
KSeF-related errors‚ while unrelated to the camera itself‚ may arise when transferring images to systems interacting with e-invoicing platforms. Ensure software compatibility and proper data formatting. If an unfamiliar error appears‚ note the code and consult Nikon’s support website or a qualified technician for assistance.
Resetting Your Camera to Factory Settings
Returning your Nikon Coolpix to its original factory settings erases custom preferences‚ restoring default image quality‚ menu configurations‚ and network settings. Access this function through the camera’s setup menu – typically found under “Settings” or “Reset.” Be warned: this action is irreversible and will delete personalized data!
Consider this if experiencing persistent software glitches or preparing the camera for resale. While unrelated to KSeF or e-invoicing‚ a reset can resolve camera operational issues. Back up important photos before proceeding‚ as the process will not affect stored images.
Where to Find Additional Support
For further assistance with your Nikon Coolpix‚ explore Nikon’s official website. It offers comprehensive FAQs‚ downloadable manuals‚ and troubleshooting guides – resources beyond this instruction manual. You can also access Nikon’s online community forums‚ connecting with other users and experts for peer-to-peer support.
Additionally‚ consider Nikon’s customer support hotline for direct assistance. While unrelated to systems like KSeF‚ these channels provide solutions to technical issues. Remember to have your camera model number readily available when contacting support.